Visit the tutorial
Space Scene from Scratch with Photoshop
Visit the tutorial
Abstract desktop wallpaper in photoshop!
Create a realistic Ice effect in Photoshop!

Learn how to create a realistic Ice effect in photoshop with this great tutorial! Amazing graphic design tutorial made easy in this photoshop walk through guide!
Get an Anime Look in Photoshop
 In this tutorial using photoshop, we'll learn how to get that smooth shiny Anime look. We'll start with a simple character outline uploaded into photoshop and build the correct hierarchy for the base colors, tones and highlights. Also, we'll learn how to work with this "method" for later projects in case the client or director will ask for changes, it will be easy to replace colors for a specific part of the character without redrawing all the tones and highlights again! You are about to learn one of the many techniques from the Anime and photoshop industry. Let's get started!
Eco looking green website on photoshop!
Step 1
Open a new document in Adobe Photoshop of about 650x500 pixel. Fill it up with white. With your Rounded Rectangular Tool draw a rectangular. Go to Layer > Layer Style > Gradient Overlay. Here set it just like below and make sure you check the “reverse” box.
Now to make those little flowers and grass. You take your Lasso Tool and start drawing flowers and leaves shapes. This is with what I came up with. They don`t have to be perfect and just need to look like some.
This is the picture I choose for the header, you can use anything you like.
For the menu, make a new document, draw in it a small rounded rectangular and fill it with the same green you ended the header of. Now cut it in two and drag and drop the parts on the website. I only have 3 buttons, but you can have as many as you like.
The header is done. So Ctrl+Right click on every layer, without the first layer and Merge Layers.
Step 2
For the text above use the following color (#708348). The title should be bigger and with “bold” or “strong” and the subtitle should be smaller and not ”strong”.
Step 3
Now the structure is ready. Depends on what theme will you pick for the website. Mine is a non-profit organization that is helping children. In the Box below you should add info and because of the colors you can divide it in sections.
Step 4
Now add the text and anything else you like and the layout is ready. Mine looks like this.
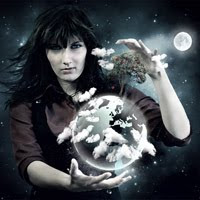
Blend a Planet into a Photo Manipulation

In this tutorial Jarka H will show you how to use different blending modes to blend flying hairs easily and to make semi-transparent planet. he'll also show you different techniques of adjustment to get the most realistic results in your photo manipulations! great graphic design!
Environmentally friendly design :D

Creating an Environmentally Friendly Green Type Treatment
“With oil prices the way they are today, everybody is thinking Green… In the following Illustrator tutorial, I’ll teach you how to create a Green type treatment. It works great for logos and other design elements.”
Excellent tutorial, great use of highlights and shadows to create depth.
Visit the tutorial


